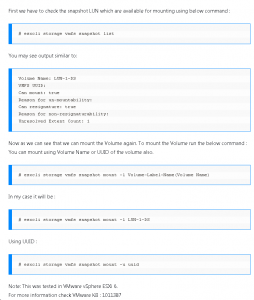
También tenemos la opción de poder comprobar toda la cadena de disco, así podremos determinar si alguno de los eslabones de la cadena están dañados o existe alguna relación no válida entre padres e hijos.
Para llevar a cabo esta acción usaremos el parámetro –chainConsistent en la construcción que mostramos a continuación
To increase the session timeout, all you need to do is change one advanced configuration parameter in the ESXi Host Client Web Interface.
First, log in to the web interface. After doing so, navigate to Host > Manage > System > Advanced Settings. Scroll down or search for the UserVars.HostClient.SessionTimeout key.
Impactos: 3
This article outlines the steps needed to enable VNC on VMware, so that the VNC console can be used within the Platform9 UI.
Step 1 – Changes Needed on the ESXi Hosts Housing the Virtual Machines
SSH to the ESXi host (not vCenter). We need to open the VNC ports on the ESXi firewall. These steps need to be performed on all the ESX hosts that are part of the clusters authorized with Platform9 controller. An automated script for doing same is coming soon.
chmod 644 /etc/vmware/firewall/service.xml chmod +t /etc/vmware/firewall/service.xml vi /etc/vmware/firewall/service.xml
Create a new service block before the end of ConfigRoot tag.
<service id=”new unique id within this file”> <id>VNC</id> <rule id=”0000″> <direction>inbound</direction> <protocol>tcp</protocol> <porttype>dst</porttype> <port> <begin>5900</begin> <end>6199</end> </port> </rule> </service>
Step 2 – Add Firewall Rules to the ESXi Firewall and Verify that Ports Have Been Opened
Verify that the firewall rules were applied and the ports are open by executing the following commands
esxcli network firewall ruleset list
# You should see a rule labelled VNC in the output esxcli network firewall ruleset rule list
# You should see the details of VNC rule i.e. port range, protocol, direction, etc.
Step 3 – Enable VNC for Existing Virtual Machines (Optional)
To enable VNC console for existing VMs, power off the VM and use one of the following:
Using vSphere Web Client
Click on “edit settings”-> Select the “VM Options” tab->Expand the “Advanced” section-> click on “Edit configuration” and add the settings mentioned at the end of this step
Directly on ESXi Host
Edit the *.vmx file of the corresponding VM and the lines mentioned here.
RemoteDisplay.vnc.enabled = “TRUE”
RemoteDisplay.vnc.port = “<port>” # Port between 5900 and 6199
IMPORTANT NOTES –
1. The key point in the step 3 is to make sure that the port number that you are adding does not collide with any other VM. One way to verify that is to SSH into the ESXi host and run grep on all the *.vmx files and choose a port that is not present in the output
grep “vnc.port” */*/*/*/*.vmx
2. For VNC console to work, the appliance, the ESX host, and the browser where the VNC is being accessed need to have IP connectivity to each other.
Tenemos un archivo huérfano *-flat.vmdk que tiene el contenido completo de un disco y queremos recuperar sus datos.
Pasos:
1.- Nos conectamos al host vSphere via SSH
2.- Navegamos hacia el datastore donde tenemos el archivo *-flat.vmdk.
3.- Hacemos un ‘ls -l’ del fichero para ver su tamaño
4.- Escribimos el siguiente comando:
# vmkfstools -c tamaño -a lsilogic -d thin temp.vmdk
Donde -c contiene el tamaño del archivo *-flat.vmdk
Donde -a es el controlador virtual (casi siempre es lsilogic)
Y -d crea un disco en formato thin-provisioned con el nombre que le demos (no usar el mismo nombre que el original ya que esto pisará el archivo con un disco de datos en blanco).
5.- Como resultado se crearán los ficheros temp.vmdk y temp-flat.vmdk
6.- Borramos el fichero temp-flat.vmdk que no contiene datos, está en blanco
7.- Renombramos el fichero temp.vmdk al nombre del *-flat.vmdk huérfano que tengamos (ponemos el mismo nombre pero quitando -flat)
8.- Editamos con vi el fichero *.vmdk recién renombrado
Utilizamos cookies propias y de terceros para obtener datos estadísticos de la navegación de nuestros usuarios y mejorar nuestros servicios ofreciendo una experiencia de navegación personalizada. Si aceptas o continúas navegando, consideramos que apruebas su uso. Puedes obtener más información sobre nuestra política de cookies. Cookie settingsACCEPT
Privacy & Cookies Policy
Privacy Overview
This website uses cookies to improve your experience while you navigate through the website. Out of these cookies, the cookies that are categorized as necessary are stored on your browser as they are as essential for the working of basic functionalities of the website. We also use third-party cookies that help us analyze and understand how you use this website. These cookies will be stored in your browser only with your consent. You also have the option to opt-out of these cookies. But opting out of some of these cookies may have an effect on your browsing experience.
Necessary cookies are absolutely essential for the website to function properly. This category only includes cookies that ensures basic functionalities and security features of the website. These cookies do not store any personal information.