

Steps to install PrestaShop on Ubuntu 22.04 Server
The steps given here to set up PrestaShop on Ubuntu 22.04 will be the same for Ubuntu 20.04 and 18.04 including Debian 11 server.
What do we need to perform in this tutorial?
⇒ A clean Ubuntu 22.04 server
⇒ A user with sudo access
⇒ Internet connection
1. Update Ubuntu 22.04 Server
The first thing to perform after login into the Ubuntu server to install PrestaShop is to make sure our system is up to date. For that run the given command using APT.
sudo apt update && sudo apt upgrade
2. Install Apache web server
We need a web server to deliver the content generated by Prestashop using PHP. Hence, here we are opting popular Apache web server. To install it on Ubuntu run:
sudo apt install apache2
Enable Apache mod_rewrite module
sudo a2enmod rewrite
sudo systemctl restart apache2
3. Install the MariaDB database
Well, to store the data we can either use MySQL or its fork MariaDB. Here we are going for MariaDB, those who want to use MySQL can follow this tutorial. Just like Apache, packages to install the MariaDB server are also available to download using the default system repository of Ubuntu. Hence, simply run:
sudo apt install mariadb-server
To ensure the service of the Database is enabled and running, use:
sudo systemctl enable --now mariadb
Now, secure your Database instance:
sudo mysql_secure_installation
Questions Answers
Enter current password for root (enter for none): Hit the Enter key
Switch to unix_socket authentication [Y/n]: Type – y and hit the Enter key
Change the root password? [Y/n]: If you want to change the root password for MariaDB then press Y otherwise – n

Remove anonymous users? [Y/n]: Type – y and hit the Enter key
Disallow root login remotely? [Y/n]: Type – y and hit the Enter key
Remove the test database and access it. [Y/n]: Type – y and hit the Enter key
Reload privilege tables now? [Y/n]: Type – y and hit the Enter key

4. Create Database for PrestaShop
Now, let’s create a Database to store the data generated by the PrestaShop while installing and later, such as product data, users, and more…
sudo mysql
Note:presta_h2s is the database here and prestauser is the user and the password is the password we used for the database user. Change them as per your choice.
Create Database
create database `presta_h2s`;
Create a User with a password
create user 'prestauser'@'localhost' identified by 'password';
Grant all permissions of Database to User
GRANT ALL PRIVILEGES ON `presta_h2s`.* to `prestauser`@localhost;
exit;
5. Install PHP 7.4 on Ubuntu 22.04
As we know PrestaShop is a PHP-based e-commerce platform, hence, our system should have PHP and required extensions by it to make this platform work properly. The version of PHP while doing this article on Ubuntu 22.04 was PHP8.1. However, the PrestaShop requirement was PHP7.4, hence we have to install that. But the PHP 7.4 is not available to get using the default system repository, therefore add Ondrej PPA.
sudo apt install software-properties-common
sudo add-apt-repository ppa:ondrej/php -y
Now install PHP 7.4:
sudo apt install php7.4 php7.4-{cli,common,curl,zip,gd,mysql,xml,mbstring,json,intl}
Now, change the memory and upload file limits.
To find the path of your php.ini file run the below command:
php -i | grep -i php.ini
Now, see the path and use it to edit the php.ini file
In our case it was:
sudo nano /etc/php/7.4/cli/php.ini

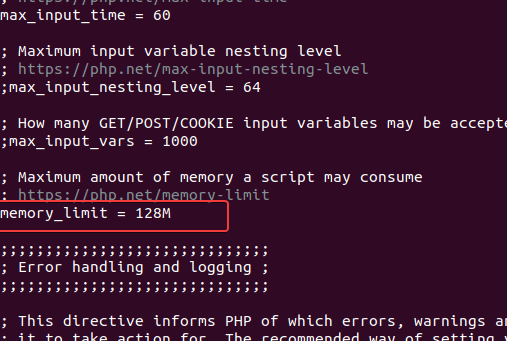
Find two lines:
Change memory_limit value to 128M
memory_limit= 128M
And also increase the upload size of the file to 16 MB or 32 MB, as per your requirements.
upload_max_filesize = 32M

Save the file using Ctrl+O, hit the Enter key, and then exit the file using Ctrl+X.
Finally, restart the apache
sudo systemctl restart apache2
6. Download PrestaShop on Ubuntu 22.04
Get the latest version of the PrestaShop directly on your system using the command terminal. Here is the Github page link to get the latest release, however, use the given command to download it.
sudo apt install curl
cd /tmp
curl -s https://api.github.com/repos/PrestaShop/PrestaShop/releases/latest | grep "browser_download_url.*zip" | cut -d : -f 2,3 | tr -d \" | wget -qi -
7. Unzip and move Prestashop to the www folder
After downloading the latest version of the PrestaShop, unzip it and move the folder to the webroot directory of the web server. So, that it could be used safely for calling through a web browser.
sudo unzip prestashop_*.zip -d /var/www/prestashop/
Note: If you don’t have an unzip tool, then install it using the command:sudo apt install unzip
8. Change Permission to Apache user
Change the permission of the Prestashop folder to Apache’s www-data user and group, for that the syntax will be:
sudo chown -R www-data: /var/www/prestashop/
9. Configure PrestaShop virtual Host for Apache
In case you are planning to use multiple domains on your Apache webserver then creating a virtual host for Prestashop will be a great idea. This will also let us use our domain for accessing the front-end and backend of the PrestaShop without showing the directory in which we have kept its all files. Therefore create a new Apache configuration file and enable make it.
sudo nano /etc/apache2/sites-available/prestashop.conf
Copy-paste the following lines in the file and save them by using Ctrl+X and type Y and hit the Enter key.
Note: change your_example.com, the domain you want to use for PrestaShop.
<VirtualHost *:80> ServerAdmin admin@your_example.com ServerName your_example.com ServerAlias www.your_example.com DocumentRoot /var/www/prestashop <Directory /var/www/prestashop> Options +FollowSymlinks AllowOverride All Require all granted </Directory> ErrorLog /var/log/apache2/prestashop-error_log CustomLog /var/log/apache2/prestashop-access_log common </VirtualHost>
Enable the Prestashop Apache configuration and restart the web server.
sudo a2ensite prestashop.conf
Disable the default Apache page
sudo a2dissite 000-default.conf
sudo systemctl restart apache2
10. Access Ubuntu 22.04 running Ecommerce Store
Everything is ready and it’s time to access our Ubuntu 22.04 or 20.04 installed PrestaShop eCommerce store for further settings. Open the browser on your local system and type the Ip address or domain.com pointing to the store.

Simple Text
Impactos: 0

Impactos: 0